Settings for a Gallery Collection include the following:
- Owner
- User Permissions
- Publish Permissions
- Collection Description
- Collection Color
- Collection Rules
- Custom Filters
- Collection Preview
- Collection IP Filters
Manage Collection Setting
To manage Gallery Collection settings:
-
Select a collection from the list of available collections in Gallery.
-
Navigate to Manage > Settings on the top right-hand corner to open the Collection Settings page.

Owner
The collection owner functionality ensures that each collection in the Kapost Gallery displays its owner for better transparency and management. By default, the owner is the user who creates the collection. However, admins or the current owner can transfer ownership to another user, provided the user has the necessary permissions.
To assign a owner, click the drop-down menu and select a user.

The users visible in the owner selection drop-down depend on the collection's permission settings. If the collection user permission is:
-
Public: All users are displayed in the drop-down.
-
Private (All logged-in users): All users are displayed in the drop-down.
-
Private (Specified users, groups, roles): Only the selected users, users in the selected groups, users with the selected roles, and admins are displayed in the drop-down.
User Permissions
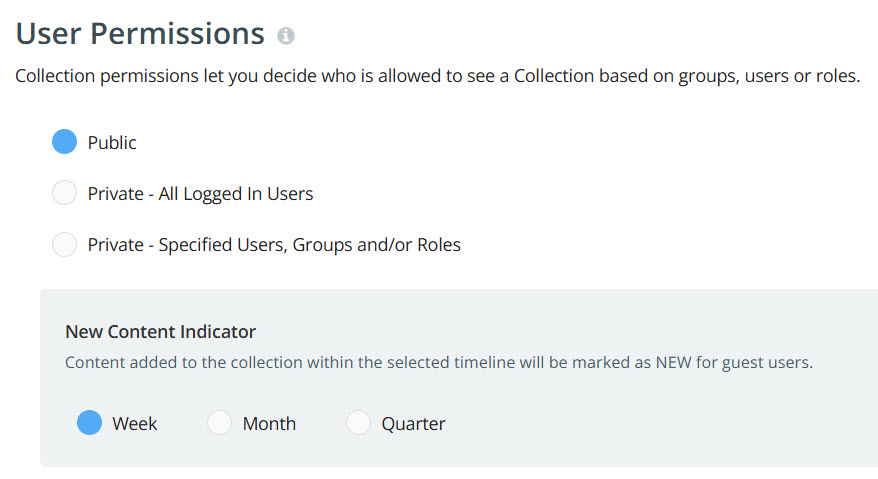
Collection permissions let you decide who is allowed to see a Collection based on groups, users or roles. To learn more about user permissions, refer to Gallery Permissions.
New Content Indicator
This feature is only applicable when user permission is set to Public. The New Content Indicator highlights a Collection as NEW for non-licensed (guest) users when content is added within a specified timeframe — up to a week, a month, or a quarter.
Collection Description
To add or edit a collection description, enter text into the description box. Click Save when finished.

Collection Color
To change the color of the collection, select the desired color from the available options. You will be notified that the change was automatically saved.

Collection Rules
You can establish custom rules to alert you when relevant content for a collection is added to the Gallery. Rules identify the type of content that has been added to the Gallery based on content type or custom field. For example, you can set a rule to alert you whenever a Blog Post content asset is created (content type=blog post).
When more than one rule is established the rules are considered "and" rules meaning that the criteria for rule 1 and rule 2 must match. For example, you can set a rule to alert you whenever a Blog Post with a Region of North America is created (content type=blog post and region=North America).
Each Gallery Collection can be configured with its own set of custom filters that consumers use to filter the display of content assets. Different custom field filters can be used for each Gallery Collection.
Apply Custom Rules for a Collection
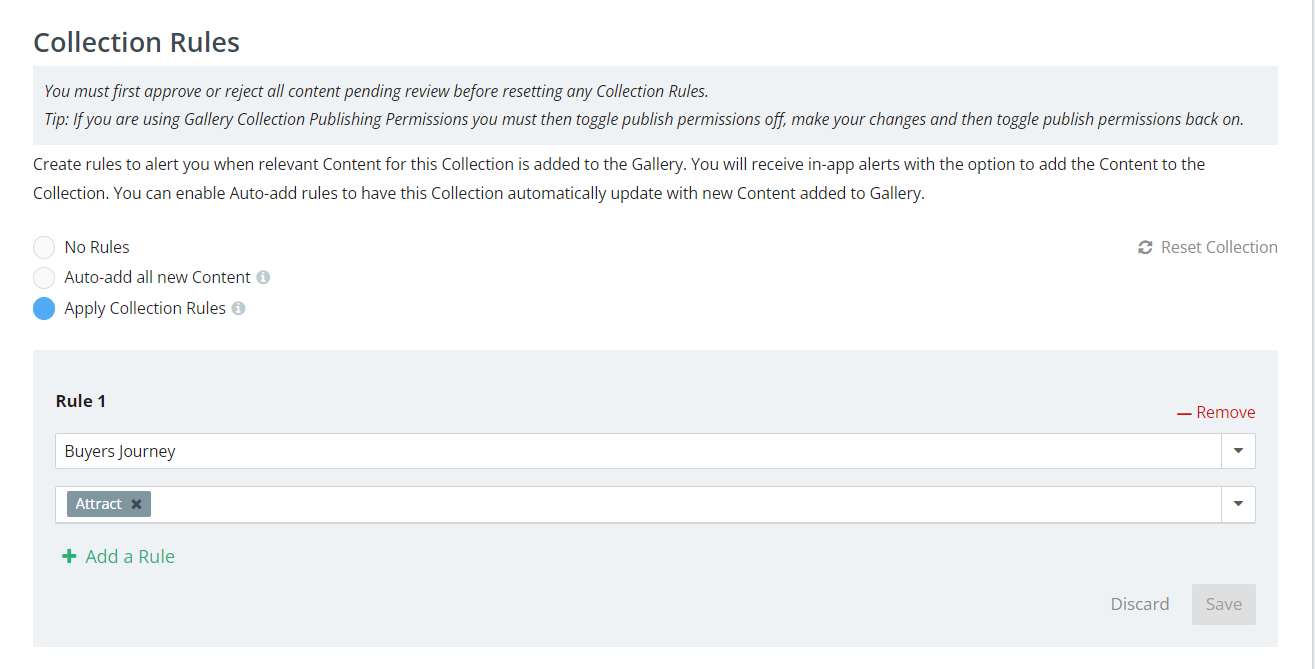
Select one of the following Collection Rule:
- No Rules – If set to No Collection Rules then no content will be automatically added to the Collection.
- Auto Add All New Content – If set to Auto Add All Content, any newly added content (from the time the rule was set) will be automatically added to the Collection and any Collection rules will be disabled.
- Apply Collection Rules – If set to Collection Rules, then any new content fitting the applied rules will automatically be added to the collection.
Select Collection Criteria
- Click on the content type… drop-down menu to choose the content type or custom field you would like to set the rule for.
- Click the drop-down menu below the horizontal line and choose a value for the criteria specified.
- To add subsequent rules click the +Add a Rule option and enter the appropriate custom field and value information.
- Click Save.
When you create a Collection and apply set rules, Kapost evaluates all content to see what fits and puts it into a collection. When you add new content to Gallery, it's evaluated and added to a Collection based on the selected criteria and applied rule. If you add a new rule to an existing Collection, then Kapost will assess all the content in your Gallery to find any content that fits the new rule to add to the Collection.
However, if you update a metadata tag on content that fits a rule but the content has already been evaluated, then the content won't automatically be added to a Collection where the rule fits because that doesn't trigger the collection to re-evaluate the content.
If Auto Add Content is not selected, Kapost will add a bell icon to the collection identified according to the rule. The bell icon signifies that there is unhanded content pending that needs to be approved(added to the collection) or dismissed.
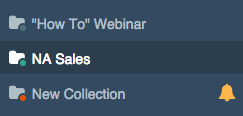
Once the collection is clicked, you will be taken to the collection's page. The bell icon will disappear once there are no longer unhanded content assets in the collection pending approval.
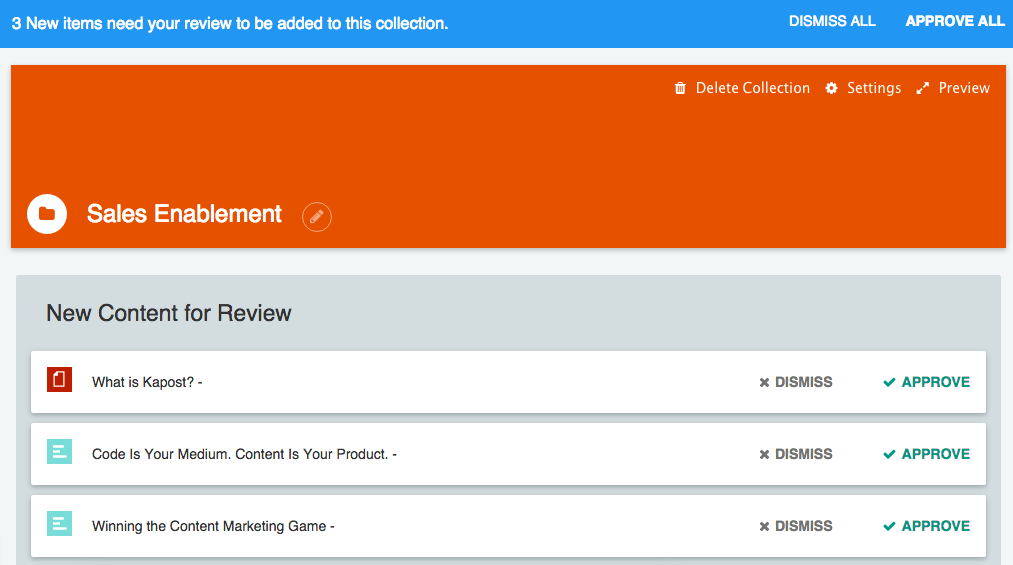
At the top of the page a message will display. Click Approve All to add the content assets to the collection. Click Dismiss All to make the message and content assets disappear.
You can also approve or dismiss one content asset at a time.
The unhanded content assets will remain at the top of your content list. This list will only display 50 content assets at a time. If there are more than 50 unhanded content assets, more content will appear once you begin approving or dismissing content.
See Gallery Auto Add Rules for more information.
Custom Filters
Add custom fields to enable users to narrow their search for content in the collection.
Note: Custom fields must be enabled in Studio Settings before they are available to add in Gallery. Learn how to do this here.
- From the Gallery Manage page, select the collection from the list of available collections.
- Choose the Settings option.
- Click the Custom Filters Expand button.
- Select the Main Custom Filters from the 5 pull down menus.
- To add more filters, click +Add a Filter under more filters.
- Click the close button when you are finished.
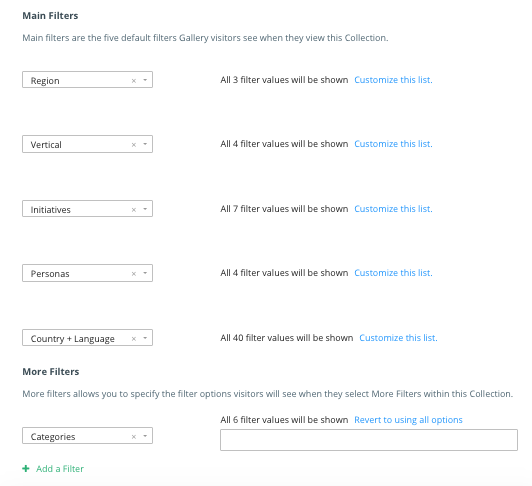
The option is available to limit the values users can filter by. This is useful for a collection where your audience would only need to find content based on a subset of values in certain custom filters. An example may be the Content Type Custom filter. Maybe the audience only cares about eBooks and videos.
To display a limited set of values select the Customize this list button for the appropriate custom filter. Select the desired values. Click the close button when you are finished.

Collection Preview
The Preview section allows you to perform two functions:
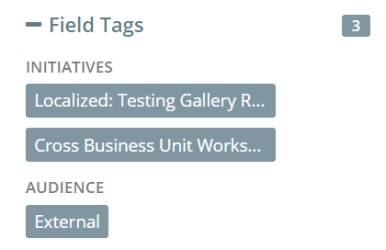
Expand Field Tags - Automatically expands the field tag in Gallery within the Details tab.
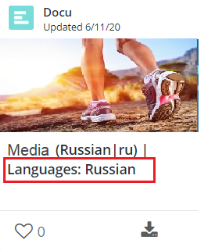
Specify Custom Fields - Allows one specified custom field to display on each thumbnail in the gallery collection.
To access the preview feature, do the following:
-
Go to Gallery and select a Collection.
-
Navigate to Manage > Settings on the top right-hand corner to open the Collection Settings page.
-
Scroll down to Preview and select the checkbox to enable the Expand Field Tags feature.
-
To add a custom field to view on the gallery collection thumbnail, select the Custom field you want from the drop-down menu.
Collection IP Filters
Add IP filters to restrict access to a particular collection in the gallery. This allows you to restrict an IP address or a range of IP addresses from viewing the collection in the gallery.
Note: The user must select Public in the User Permissions section to apply the IP filters. To select the User permissions, see Gallery Permissions.
To add the IP filter, do the following:
-
Go to Gallery and select the Collection that you want to restrict.
-
Navigate to Manage > Settings on the top right-hand corner to open the Collection Settings page.
-
Scroll down to Collection IP Filters section and click + Add a IP filter button.
-
Enter one IP address or a range of IP addresses in the empty field and click Save.
Note: You can add more than one IP address or range of IP addresses by clicking on + Add a IP filter button again.
To delete the saved IP address(es), click Remove.
